One of the necessary features of Brainio is the ability to provide continuous automatic updates to our desktop application. We use Electron framework that allows us to build a multi-platform web-based application that runs on macOS, Windows, and Linux. This post describes our initial implementation of electron automatic updates for macOS platform. It works with the electron-builder package and uses Amazon S3 as an auto update server. The post also shows how to code sign and notarize your electron app.
electron-builder vs built-in autoUpdater
Electron already comes with a built-in autoUpdater module. Unfortunately, it has some shortages:
- it only supports Mac and Windows at this moment;
- it doesn’t generate Windows installer out of the box;
- if you are developing a private application and not publishing releases to GitHub, you might need to run your own update server.
Thankfully, the Electron community has created an electron-builder package that eliminates the shortages and provides “a complete solution to package and build a ready for distribution Electron app for macOS, Windows, and Linux with “auto update” support out of the box“.
With electron-builder you can set up an
- GitHub Releases,
- Amazon S3,
- DigitalOcean Space,
- Bintray, or
- any other static file hosting.
And it’s pretty easy to do so.
Auto update configuration in electron-builder
Firstly, let’s assume you already have a buildable electron application. This section covers some of the necessary configuration steps for the build and
Common configuration
electron-builder comes with a lot of configuration options that can be defined in:
package.jsonusing thebuildfield, or- you can use a separate configuration file.
We prefer to use a separate electron-builder.json file. Initially, we fill it with the following configuration:
{
  "appId": "com.example.app",
  "productName": "AppName",
  "copyright": "Copyright © Company",
  "directories": {
    "output": "release/"
  },
  "mac": {
    "icon": "dist",
    "target": [
      "zip",
      "dmg"
    ],
    "category": "your.app.category.type"
  }
}
You might be asking why do we have two targets for mac (zip and dmg). To clarify, the zip file is required autoUpdaterdmg
Code signing
Further, code signing on macOS is very simple as electron-builder automatically picks the right identity from your keychain. You just need to make sure that you have the appId
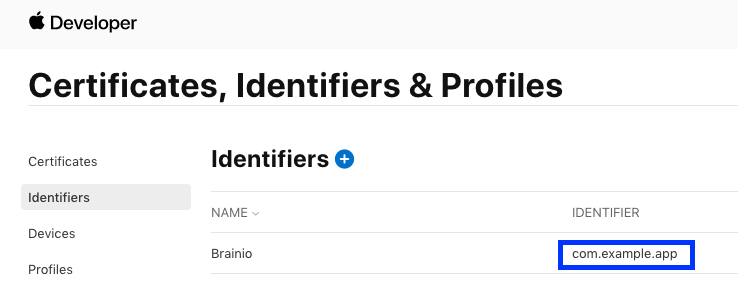
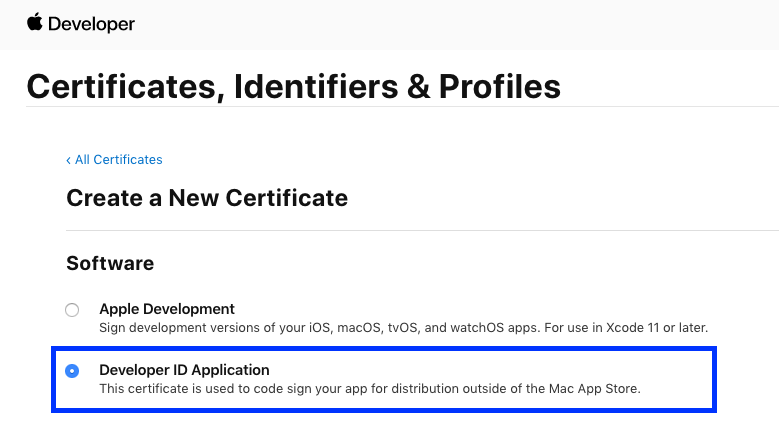
In addition, you need to make sure that you have the right Developer ID Application certificate.
Notarizing your application
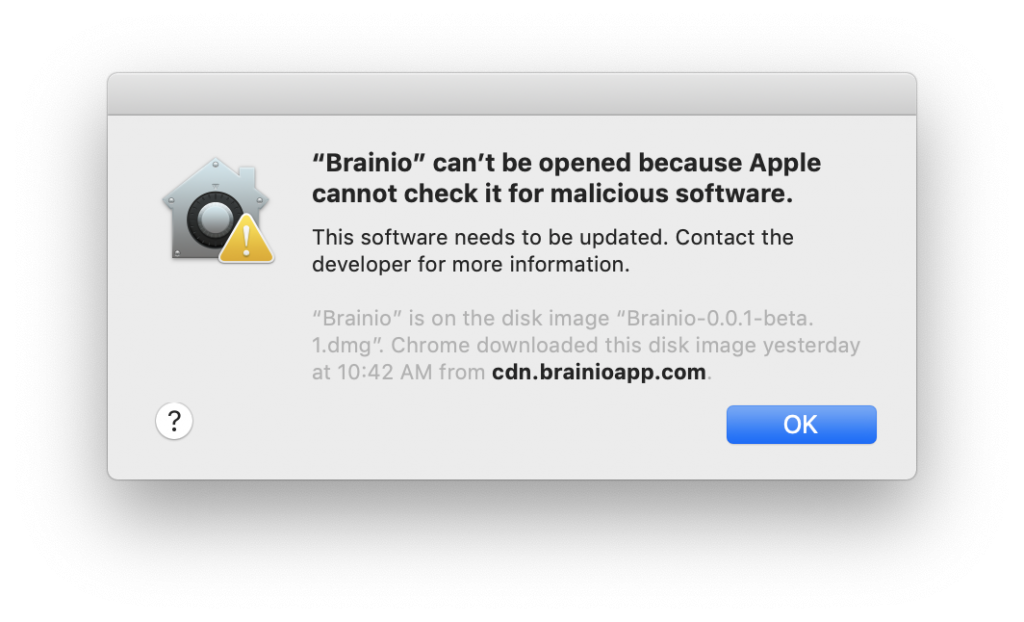
Since macOS 10.14.5, all signed applications need to be notarized otherwise Apple’s Gatekeeper software will prevent your users from installing the app, displaying “App can’t be opened because Apple cannot check it for malicious software. This software needs to be updated. Contact the developer for more information.“
Fortunately, you can follow Notarizing your Electron application by Kilian Valkhof. In a nutshell, you have to do the following:
- build your app with a hardened runtime;
- use electron-notarize to notarize it.
This means to add the following lines 8-13 to your build configuration:
"mac": {
    "icon": "dist",
    "target": [
      "zip",
      "dmg"
    ],
    "category": "your.app.category.type",
    "hardenedRuntime": true,
    "entitlements": "build/entitlements.mac.plist",
    "entitlementsInherit": "build/entitlements.mac.plist",
    "gatekeeperAssess": false
},
"afterSign": "build/notarize.js"
Importantly, don’t forget to add entitlements.mac.plistnotarize.js
Publishing to Amazon S3 bucket
Publishing with electron-builder is very simple. As I mentioned before, you can pick from multiple file hostings. We decided to go with the Amazon S3 bucket. For that, we have to add the following to our build configuration:
"publish": {
    "provider": "s3",
    "bucket": "bucketName",
    "region": "eu-west-1"
}
bucketName with your bucket name):
{
    "Version": "2012-10-17",
    "Statement": [
        {
            "Sid": "VisualEditor0",
            "Effect": "Allow",
            "Action": [
                "s3:AbortMultipartUpload",
                "s3:GetObject",
                "s3:GetObjectAcl",
                "s3:GetObjectVersion",
                "s3:ListMultipartUploadParts",
                "s3:PutObject",
                "s3:PutObjectAcl"
            ],
            "Resource": "arn:aws:s3:::bucketName/*"
        },
        {
            "Sid": "VisualEditor1",
            "Effect": "Allow",
            "Action": [
                "s3:ListBucket",
                "s3:ListBucketMultipartUploads",
                "s3:GetBucketLocation"
            ],
            "Resource": "arn:aws:s3:::bucketName"
        }
    ]
}
Once the user is created, we can get our Access key ID and Secret access key.

After that, we need to either set ~/.aws/credentials or define AWS_ACCESS_KEY_ID and AWS_SECRET_ACCESS_KEY environment variables.
As the last step we need to modify the S3 bucket permissions as following:
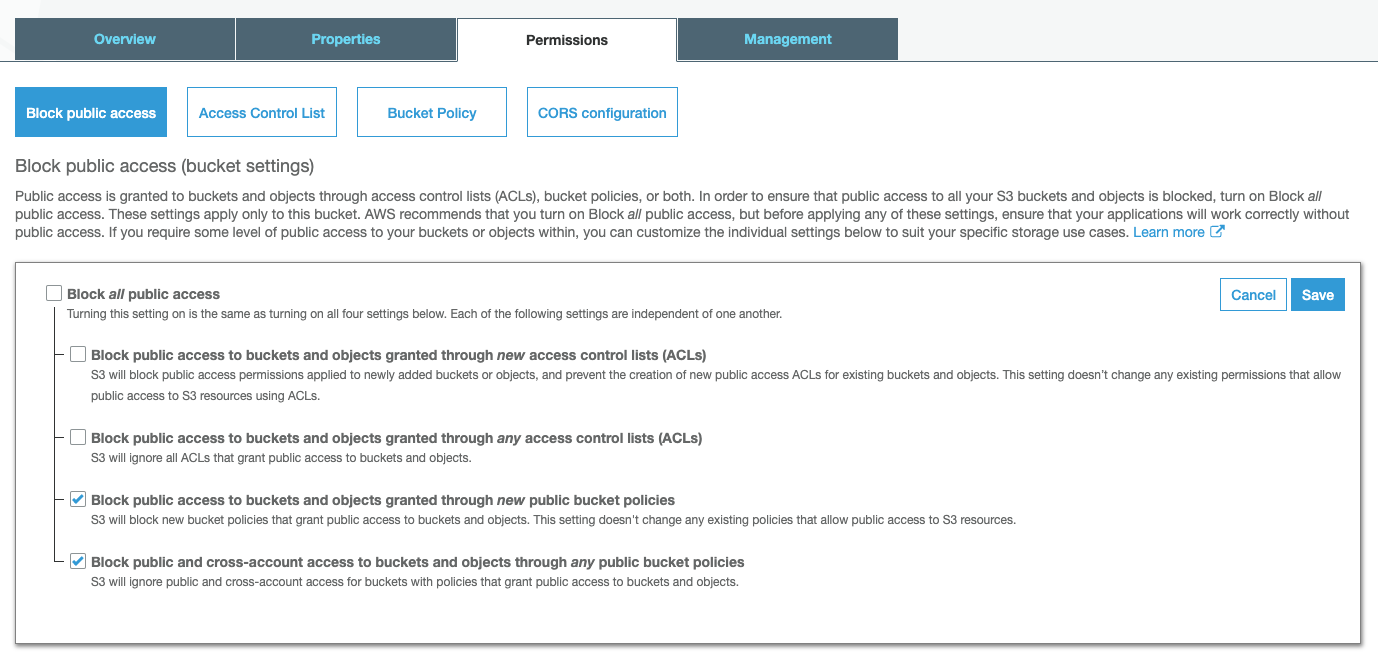
Now we should be able to publish using electron-builder CLI:electron-builder --publish.
AutoUpdater implementation and UI
As a result, we are able to publish our application. After that, it’s time to implement how automatic updates should behave. We would like to support both silent updates on the background as well as updates triggered by a user.
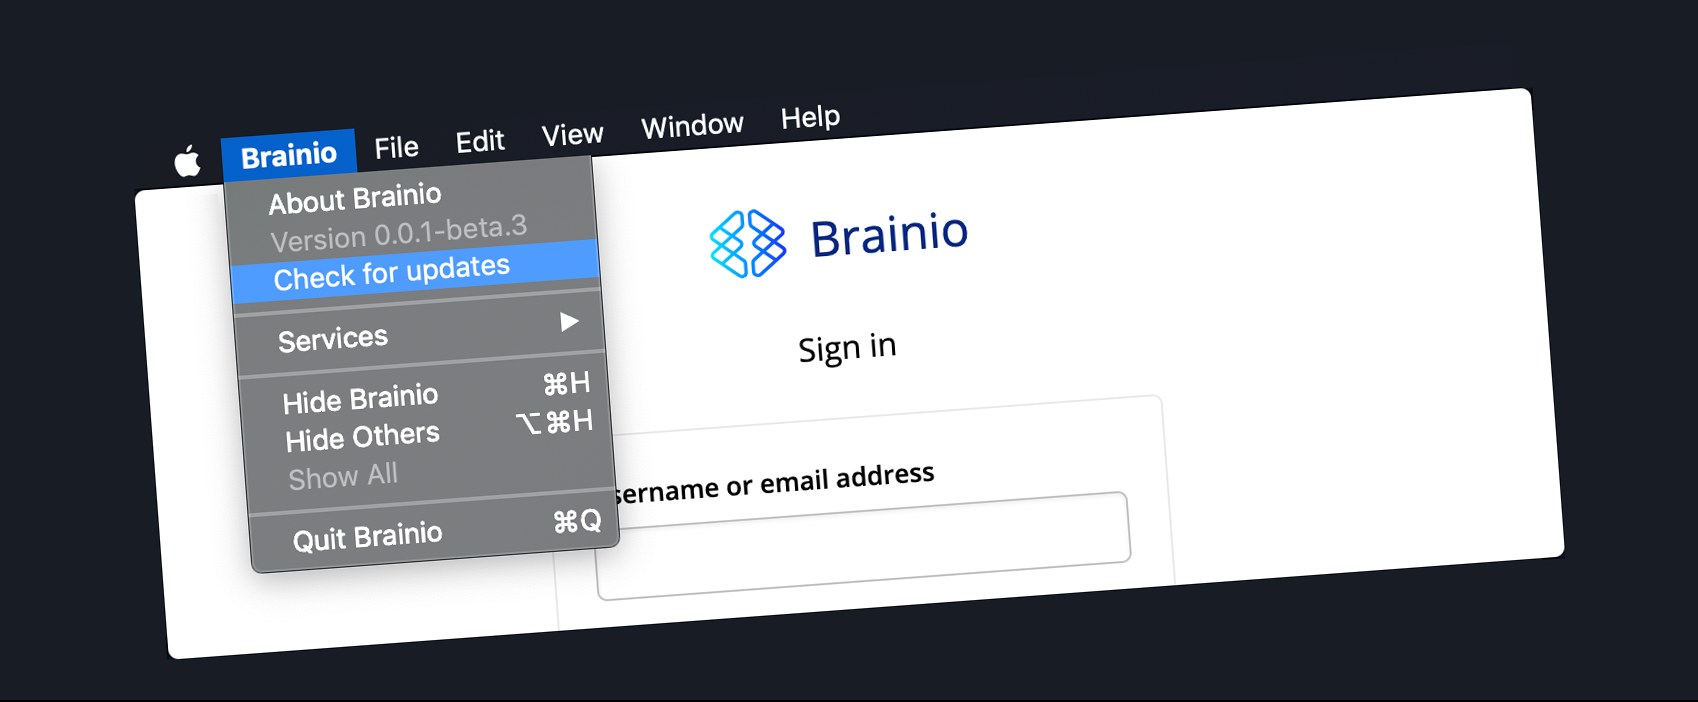
Menu with “Check for updates” item
Let’s start with a very basic Electron menu. Firstly notice the Check for
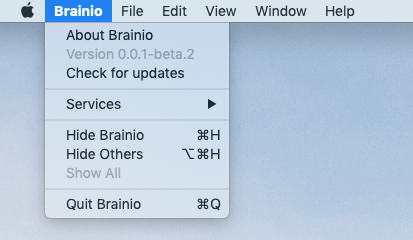
const template = [{
  label: app.getName(),
  submenu: [
    { role: 'about' },
    { label: `Version ${app.getVersion()}`, enabled: false },
    { label: 'Check for updates', enabled: false, click: () => checkForUpdates({ silent: false }) },
    { type: 'separator' },
    { role: 'services' },
    { type: 'separator' },
    { role: 'hide' },
    { role: 'hideothers' },
    { role: 'unhide' },
    { type: 'separator' },
    { role: 'quit' }
  ]
}, {
  ...
}];

const menu = Menu.buildFromTemplate(template);
Menu.setApplicationMenu(menu);
Silent updates flow
When the app starts, the Check for updates menu item is disabled and we immediately call checkForUpdates function.
app.on('ready', () => {
  checkForUpdates({ silent: true });
});
In case no updates are found, we enable the menu item and do nothing.
In case new updates are found, we change the menu to Updates available and enable it. If clicked by a user, a dialog appears asking to install the updates. Otherwise, updates will be installed automatically with the next application launch. Something like in the following video:
User triggered updates flow
When the user clicks on Check for updates, the menu item gets disabled and text changes to Checking for updates. In case no updates are found, we display a dialog showing that the application is up to date. If updates are found, we display a dialog asking the user to install them now or later. Again, you can check the following video:
checkForUpdates implementation
Both use cases described above are implemented inside the checkForUpdates function.
import { dialog, Menu } from 'electron';
import { autoUpdater } from 'electron-updater';
import { template } from './menu';
import { clone } from 'ramda';

autoUpdater.autoDownload = false;
let isSilent: boolean;
let updateDownloaded = false;

autoUpdater.on('checking-for-update', () => {
  sendStatusToWindow('Checking for update...');
});

autoUpdater.on('error', (error) => {
  sendStatusToWindow(`Error in autoUpdater. ${error}`);
  changeUpdaterMenu({ label: 'Check for updates', enabled: true });
  if (isSilent) return;
  dialog.showErrorBox('Error during the update', `Application couldn't be updated. Please try again or contact the support team.`);
});

autoUpdater.on('update-available', () => {
  sendStatusToWindow('Update available.');
  if (isSilent) {
    autoUpdater.downloadUpdate();
    return;
  }
  dialog.showMessageBox({
    type: 'info',
    title: 'Found Updates',
    message: 'New updates are available, do you want update now?',
    defaultId: 0,
    cancelId: 1,
    buttons: ['Yes', 'No']
  }, (buttonIndex) => {
    if (buttonIndex === 0) {
      autoUpdater.downloadUpdate();
    } else {
      changeUpdaterMenu({ label: 'Check for updates', enabled: true });
    }
  });
});

autoUpdater.on('update-not-available', () => {
  sendStatusToWindow('Update not available.');
  changeUpdaterMenu({ label: 'Check for updates', enabled: true });
  if (isSilent) return;
  dialog.showMessageBox({
    title: 'No Updates',
    message: 'Current version is up-to-date.'
  });
});

autoUpdater.on('update-downloaded', () => {
  sendStatusToWindow('Update downloaded.');
  updateDownloaded = true;
  changeUpdaterMenu({ label: 'Updates available', enabled: true });
  if (isSilent) return;
  dialog.showMessageBox({
    title: 'Install Updates',
    message: 'Updates are ready to be installed.',
    defaultId: 0,
    cancelId: 1,
    buttons: ['Install and restart', 'Close']
  }, (buttonIndex) => {
    if (buttonIndex === 0) {
      setImmediate(() => autoUpdater.quitAndInstall());
    } else {
      changeUpdaterMenu({ label: 'Updates available', enabled: true });
    }
  });
});

export function checkForUpdates({ silent }: { silent: boolean }) {
  isSilent = silent;
  changeUpdaterMenu({ label: 'Checking for updates...', enabled: false });
  if (updateDownloaded) {
    dialog.showMessageBox({
      title: 'Available Updates',
      message: 'New updates are available and ready to be installed.',
      defaultId: 0,
      cancelId: 1,
      buttons: ['Install and restart', 'Close']
    }, (buttonIndex) => {
      if (buttonIndex === 0) {
        setImmediate(() => autoUpdater.quitAndInstall());
      } else {
        changeUpdaterMenu({ label: 'Updates available', enabled: true });
      }
    });
  } else {
    autoUpdater.checkForUpdates();
  }
}

const changeUpdaterMenu = ({ label, enabled }: { label: string, enabled: boolean }) => {
  const newTemplate = clone(template);
  newTemplate[0].submenu[2].label = label;
  newTemplate[0].submenu[2].enabled = enabled;
  const menu = Menu.buildFromTemplate(newTemplate);
  Menu.setApplicationMenu(menu);
};

const sendStatusToWindow = (text: string) => {
  win.webContents.send('message', text);
}
For debugging purposes, we use sendStatusToWindow to log messages into the electron window. For that to work, you need to listen to message event on the ipcRenderer:
electron.ipcRenderer.on('message', (_, text: string) => {
  console.log(text);
});
Conclusion
This post showcases how to quickly implement automatic updates for macOS using Amazon S3 bucket and electron-builder package. The next step would be to implement consistent behavior for Windows and Linux platforms, which should be possible with electron-builder.
Please consider the code snippets as a quick and dirty implementation rather than a production code.